
After months of an ongoing dialog with our customers, furious coding and indefinite testing we are proud to introduce the newest version of FundPortal 3.12.
This version brings two powerful features into your hands:
– Richer user management using our new lightweight CRM:
– Sophisticated communication tools with templates and campaigns, all with analytics:
If you are familiar with MailChimp, you will probably find it easy to navigate through the new interface. However, we would like to present the most common scenarios and use cases where the functionality of FundPortal 3.12 should be very useful.
Here are some common use cases to help you get started.
1. I just attended a networking event where I met several potential investors. How can I invite them to my FundPortal?
The overhead menu has been expanded to the following tabs:

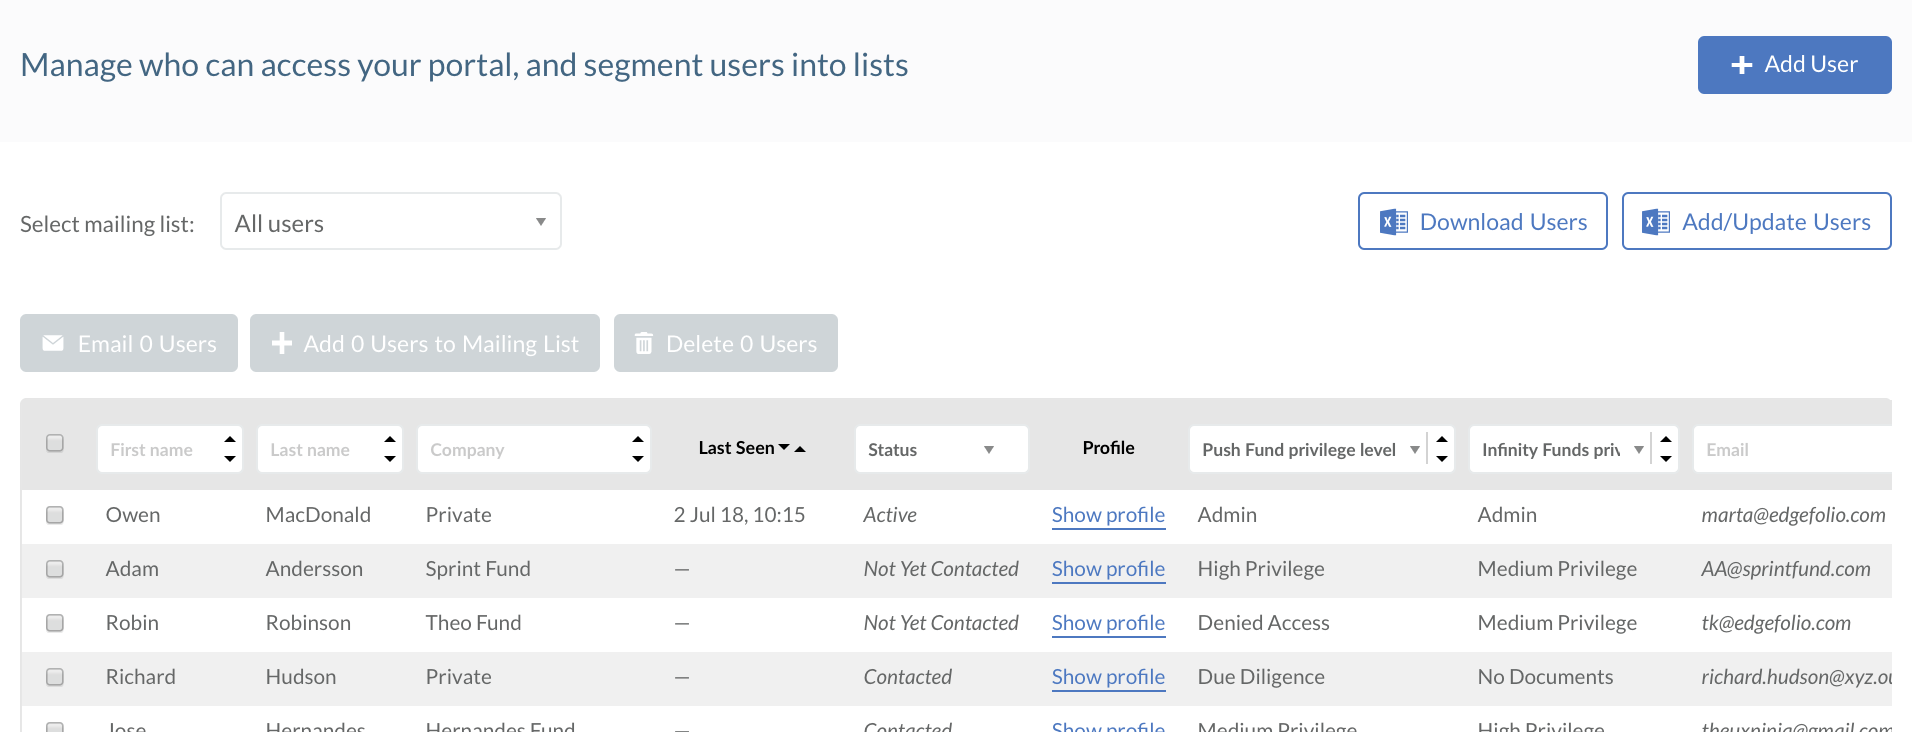
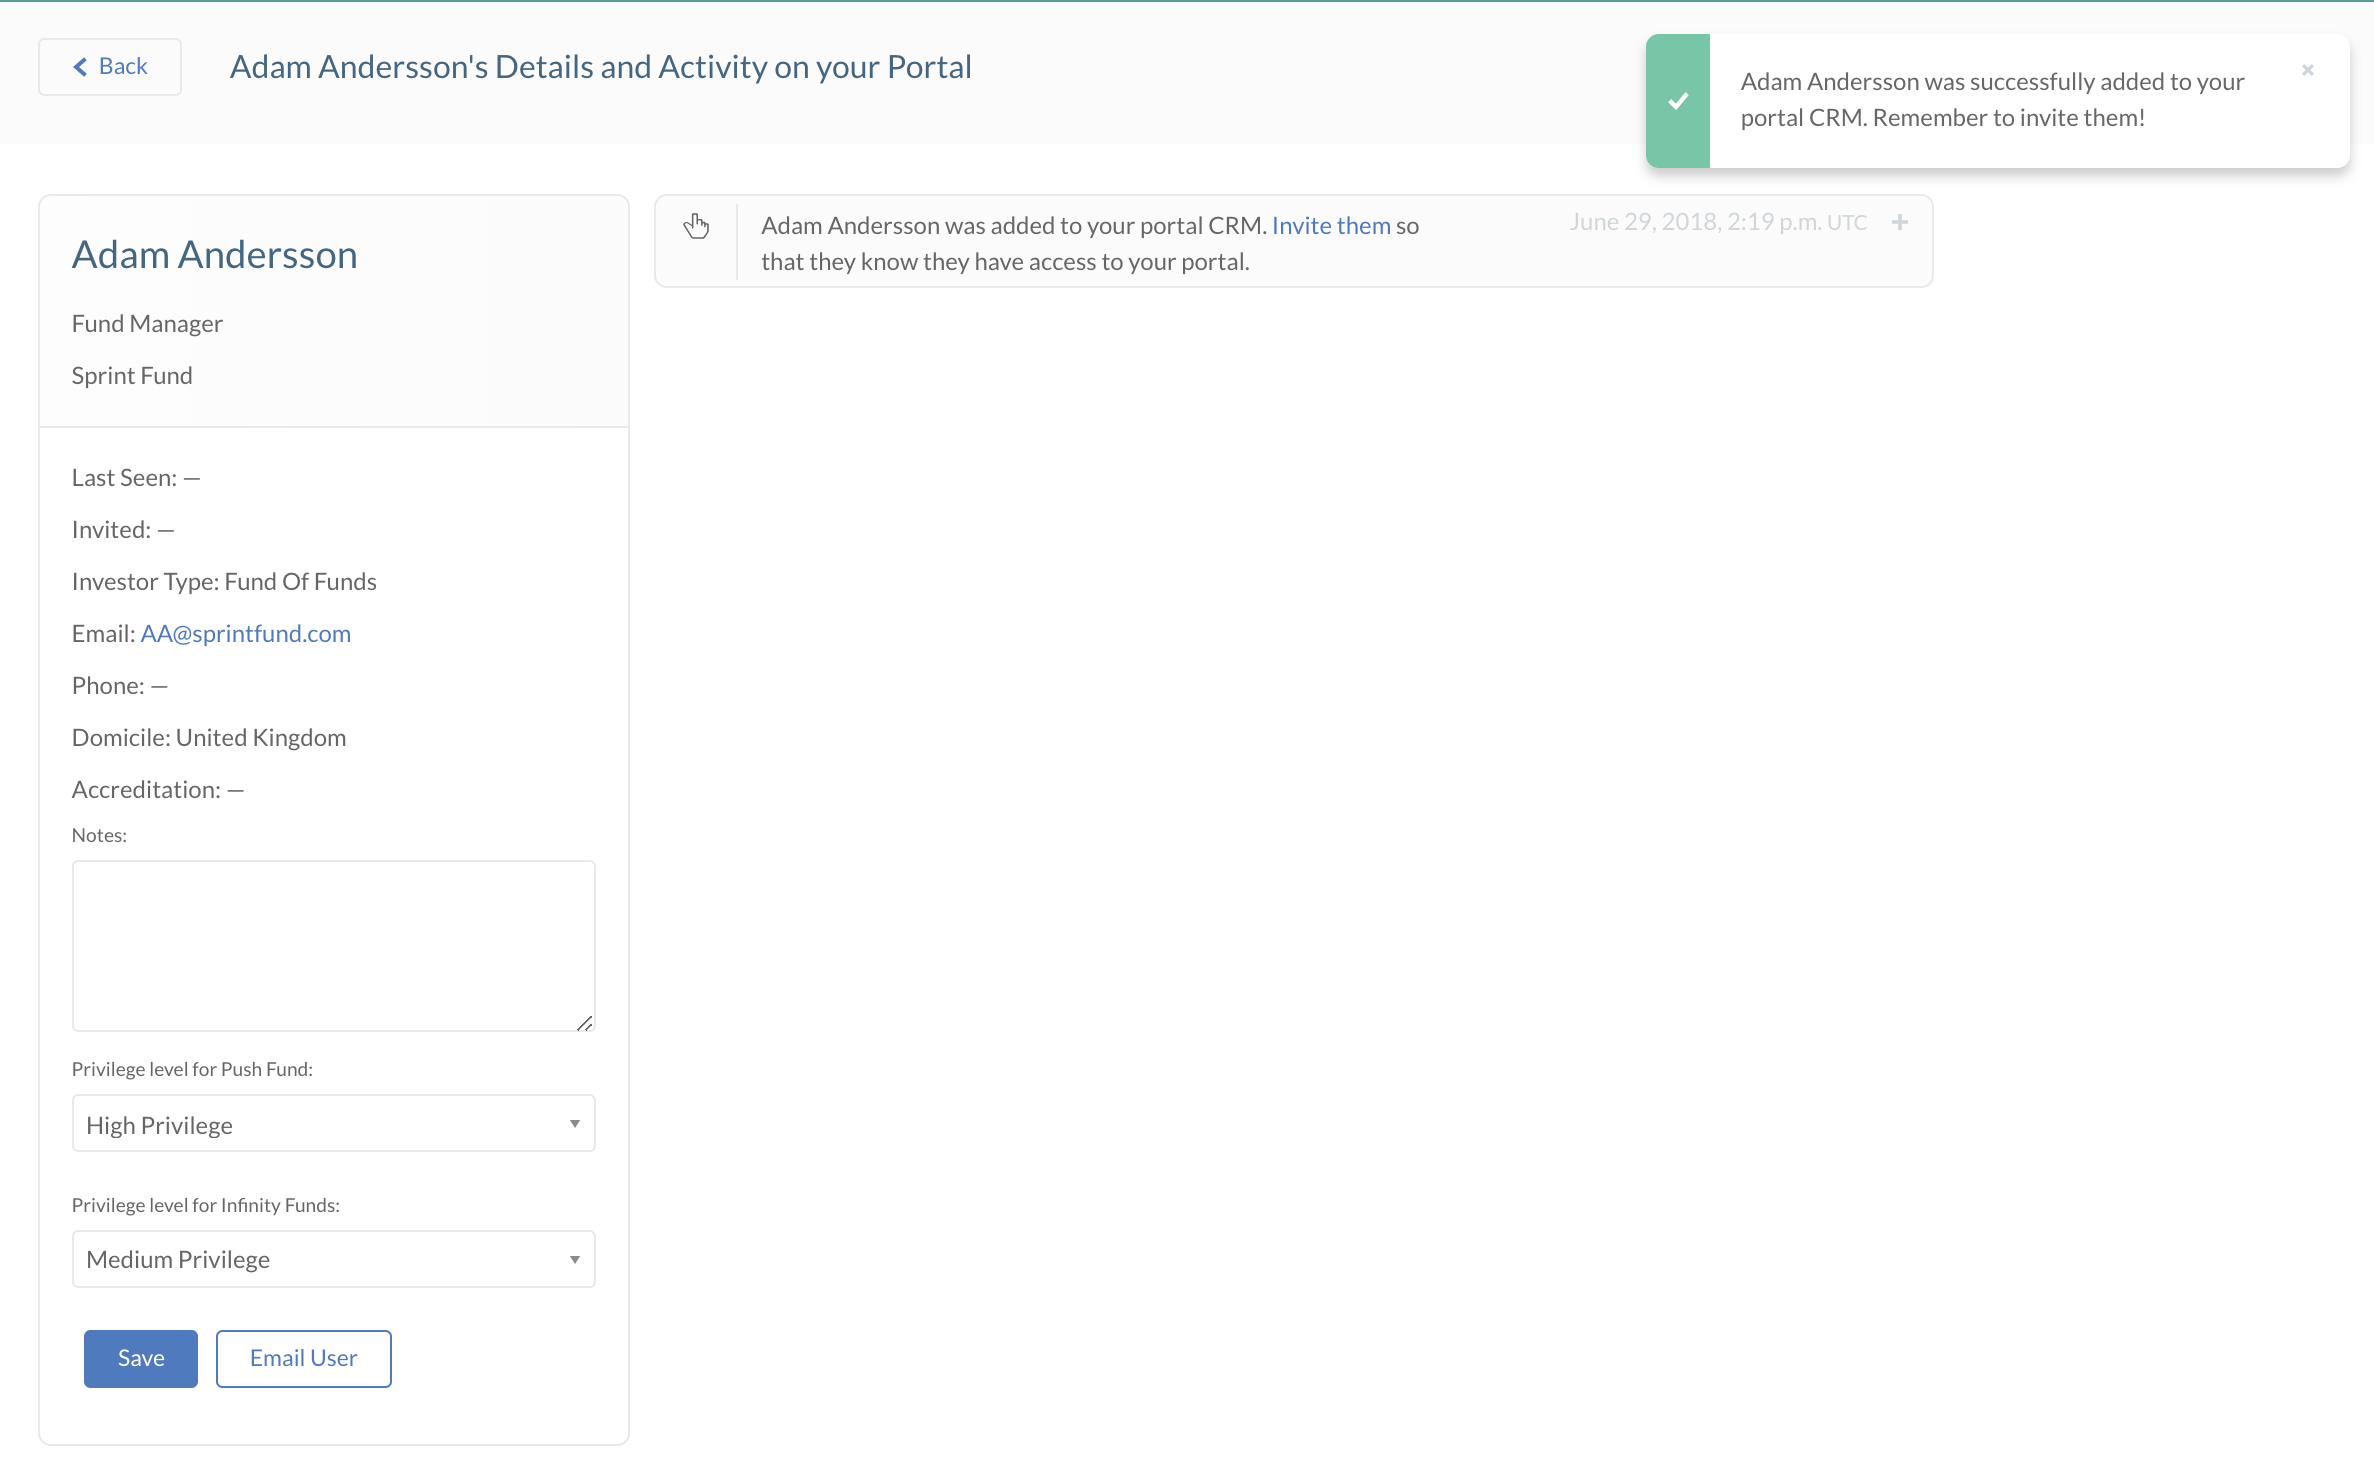
If you’d like to add a single user, go to the Users tab on top and click the “Add User” button in the upper right corner. Next, you will need to fill out details about your new user. Once that is done, click the “Save User” button at the end of the form. You will now see the profile of the newly created user. You will be able to send an invite message to that user. To make the system more flexible, we don’t automatically send out messages anymore. You can send this new user a custom invitation email by clicking the “Invite them” link.
It is also possible to easily add multiple new users:
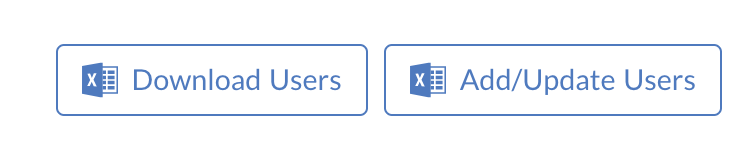
To do so, download the user list in Excel format (“Download users” button). Add the users you want to this list and upload your updated version back to the FundPortal (“Add/Update Users” button).
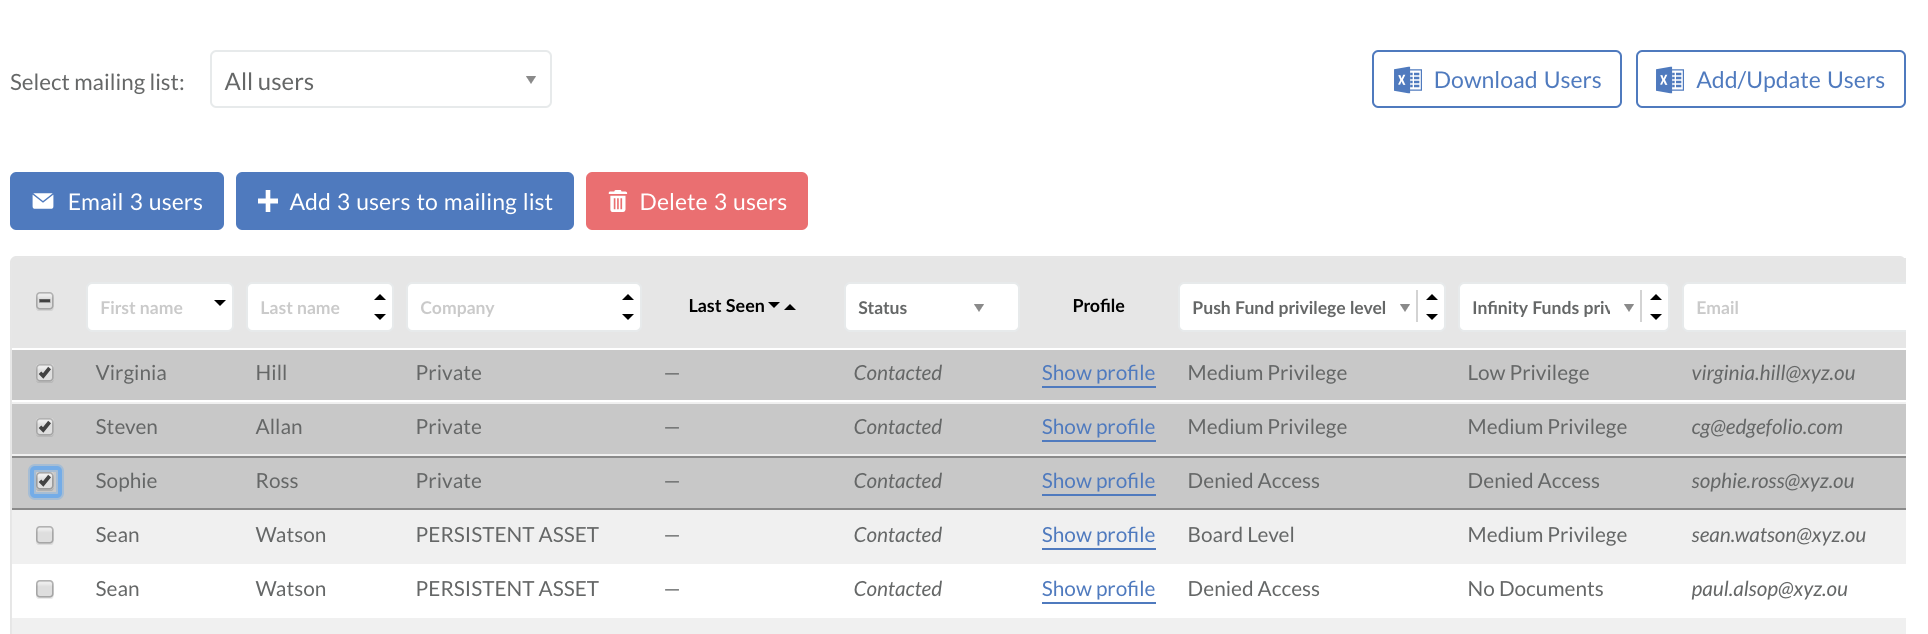
Please note that the system no longer sends out automatic emails to the new users. You now have complete control over your client communication. To invite these new users you just added, filter your user table by the status “Not yet contacted” and message the users.
You can easily change user’s details (name, company name or access level to given fund). In the table view of users simply double-click on the item you wish to change and enter a new value.
SUMMARY:
Single User: Go to the “Users” tab → Click the “Add user” button → Fill out the form → Save user → Review the saved details → Click “Email User” or link in the dialog box to send an invitation message to the new user →Watch the progress of your campaign
Multiple users: Go to the “Users” tab → Click the “Download users” button → In the Excel file, add the users → Save file → Upload the updated file by clicking “Add/Update Users” → Filter your user table by the status “Not yet contacted” → Send an invitation message →Watch the progress of your campaign
2. I have an update I would like to share with a specific group of investors. How can I communicate it?
You can now easily do this by creating a Campaign. Campaigns can be created for both groups and single user communication. Under the Campaigns tab, you can create campaigns and track the progress of each active campaign.

If you choose to contact a specific group of your users, you will need to create a new mailing list containing those specific users before creating the campaign.
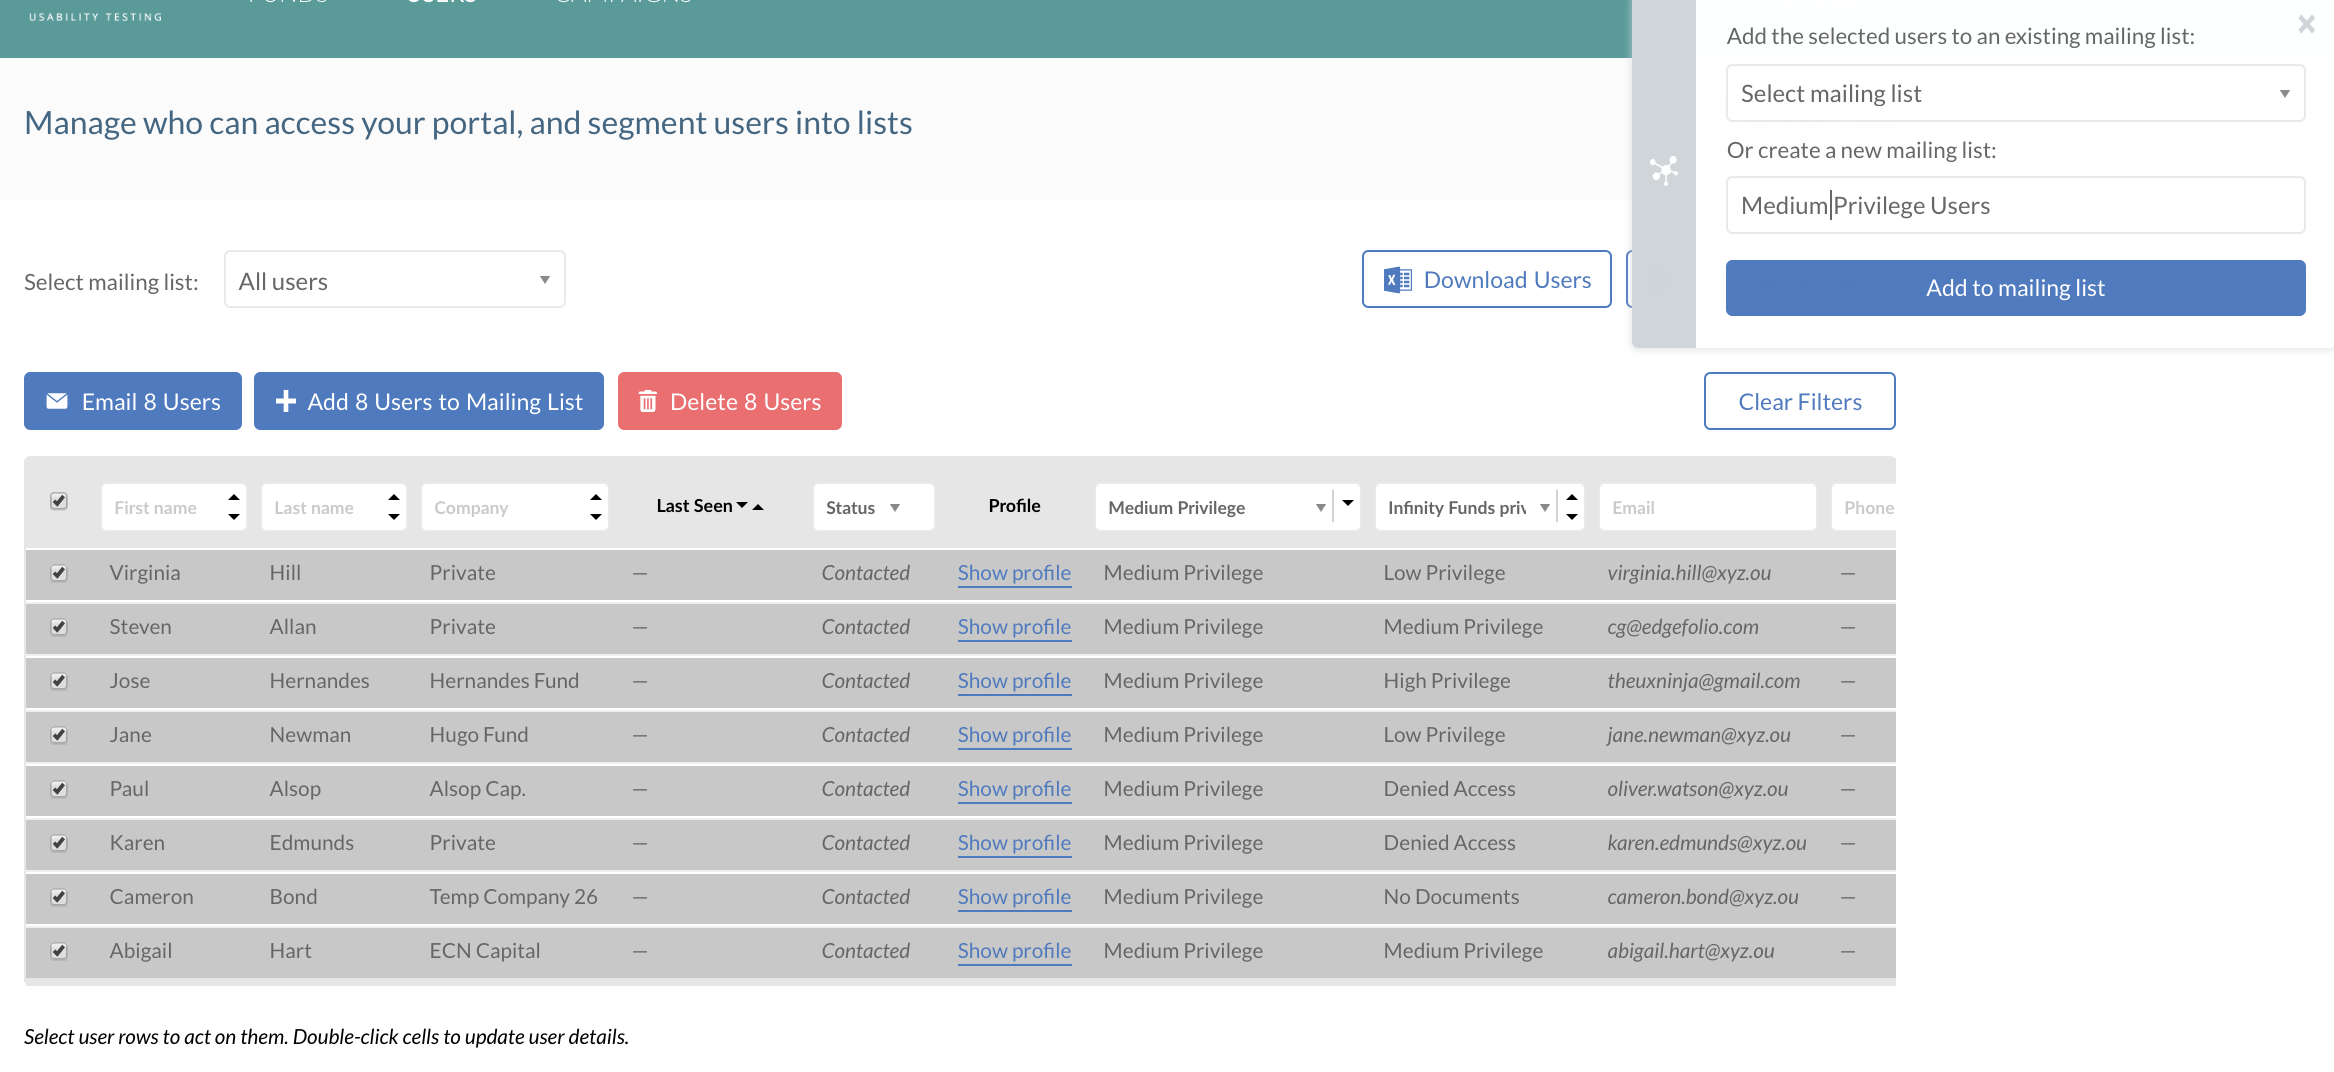
Go to The Users tab, tick off the specific users in the user list table, click on the “Add X users to mailing list” button.
You can also filter on any chosen values and choose the users based on that. A dialog window will pop-up on the upper right side of the screen asking which group to add the users to. Choose either an existing group or create a new one.
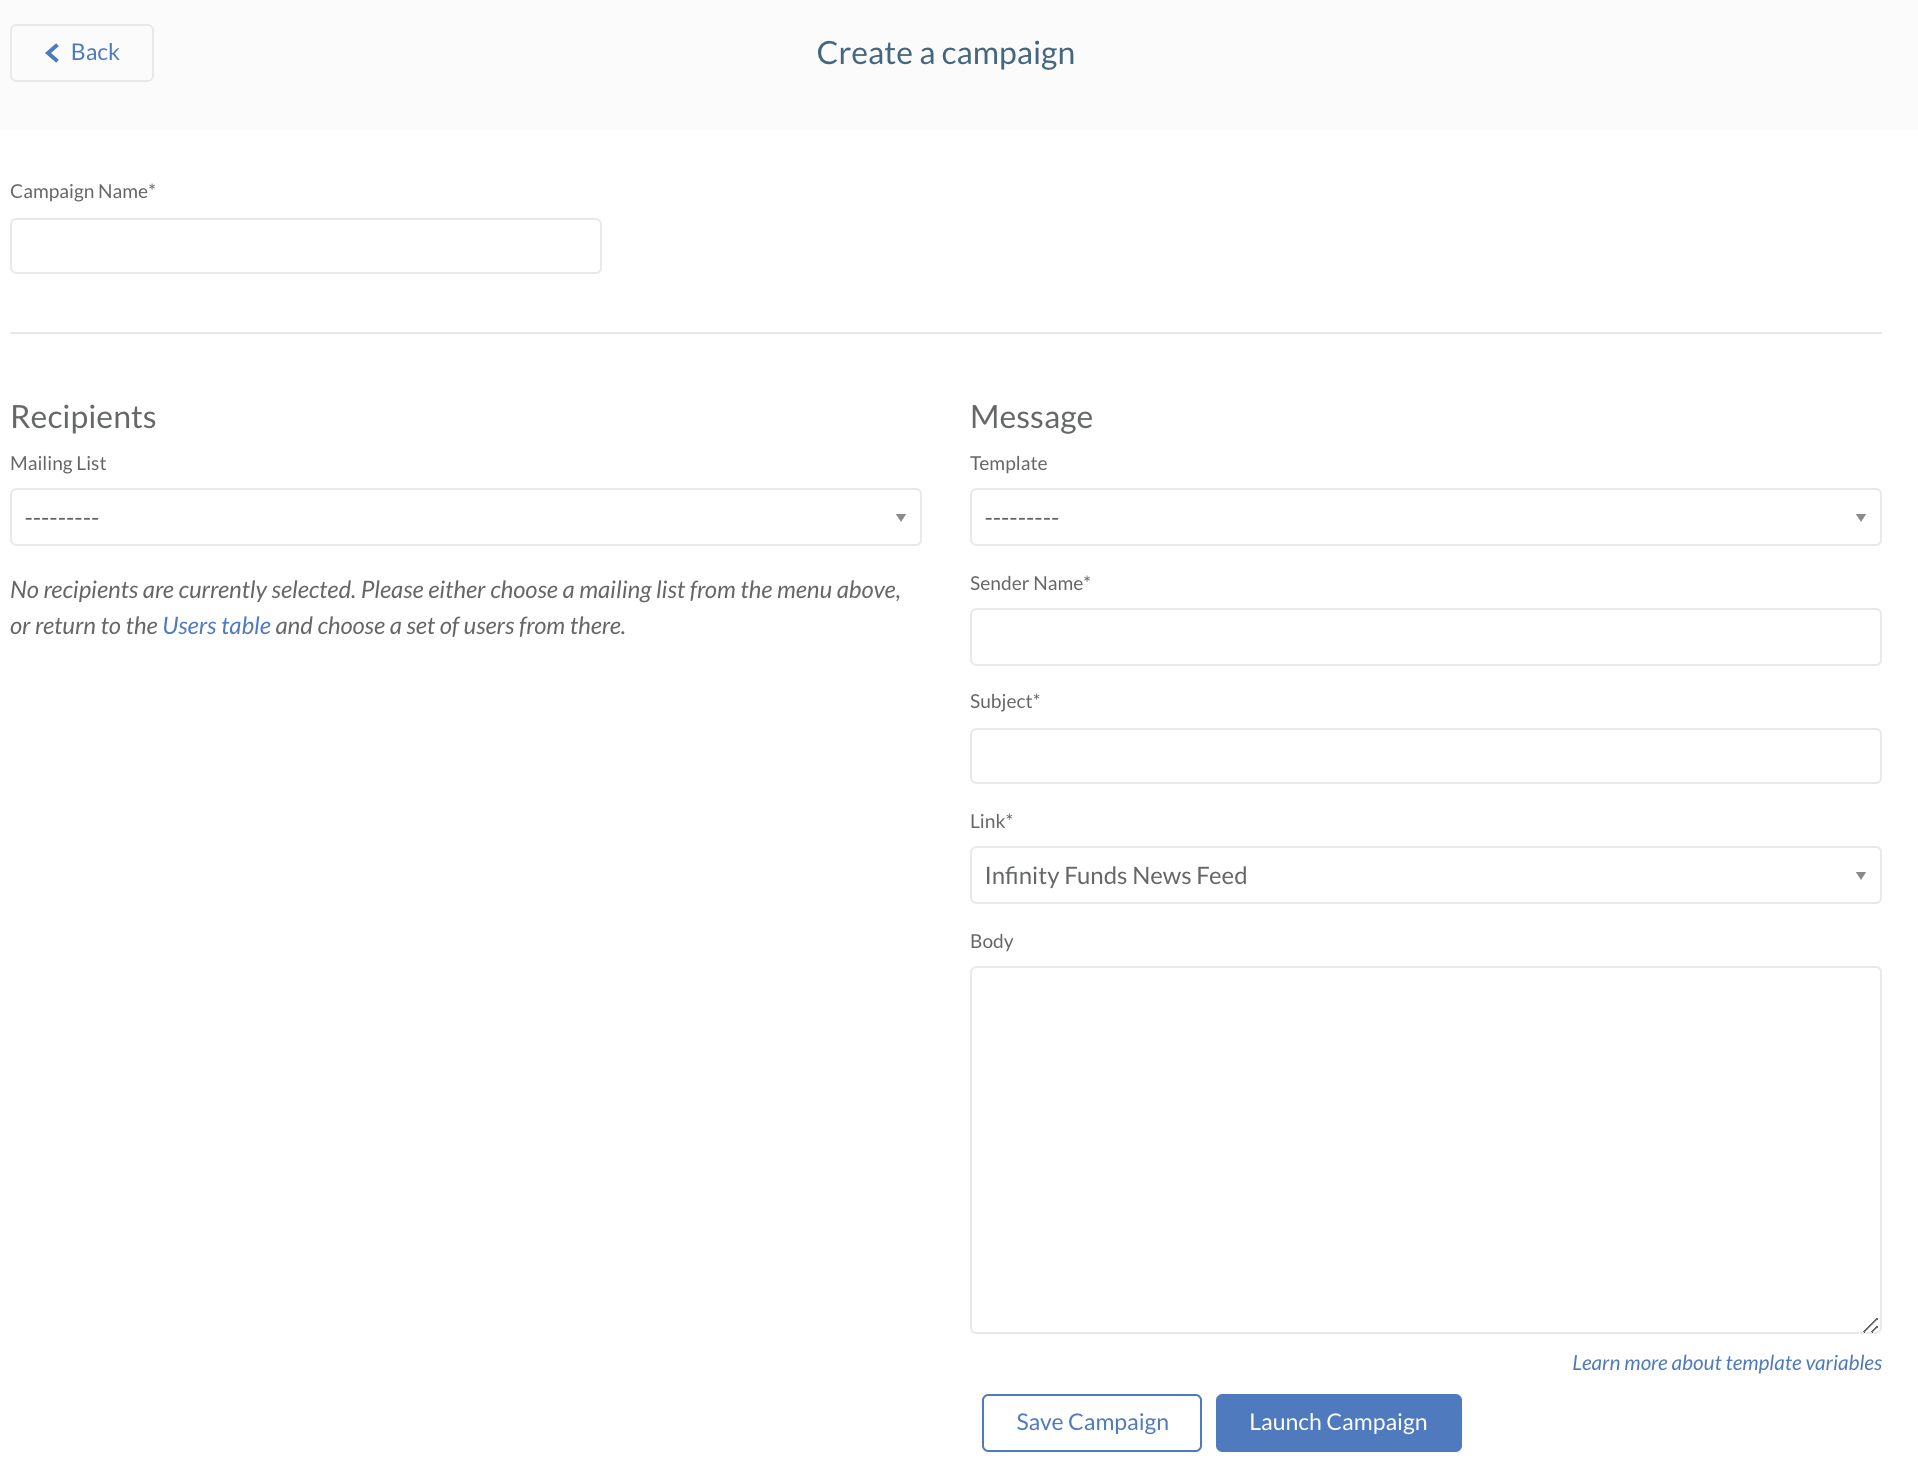
Now, head on over to the Campaigns section, and click the “Create Campaign” button.
- On the left, you can select the recipients by picking them from the drop-down list.
- On the right, you can select from one of our pre-made templates depending on the kind of communication you’d like to send.
- Feel free to make the content your own. To create or edit templates hover over your profile name in the upper right corner and choose “Update Mail Templates“.
- Link refers to either a link to a specific page in your portal or a document that you previously uploaded to any of your funds.
- Click “Save Campaign” to save the campaign for later or “Launch Campaign” to send the message out immediately:
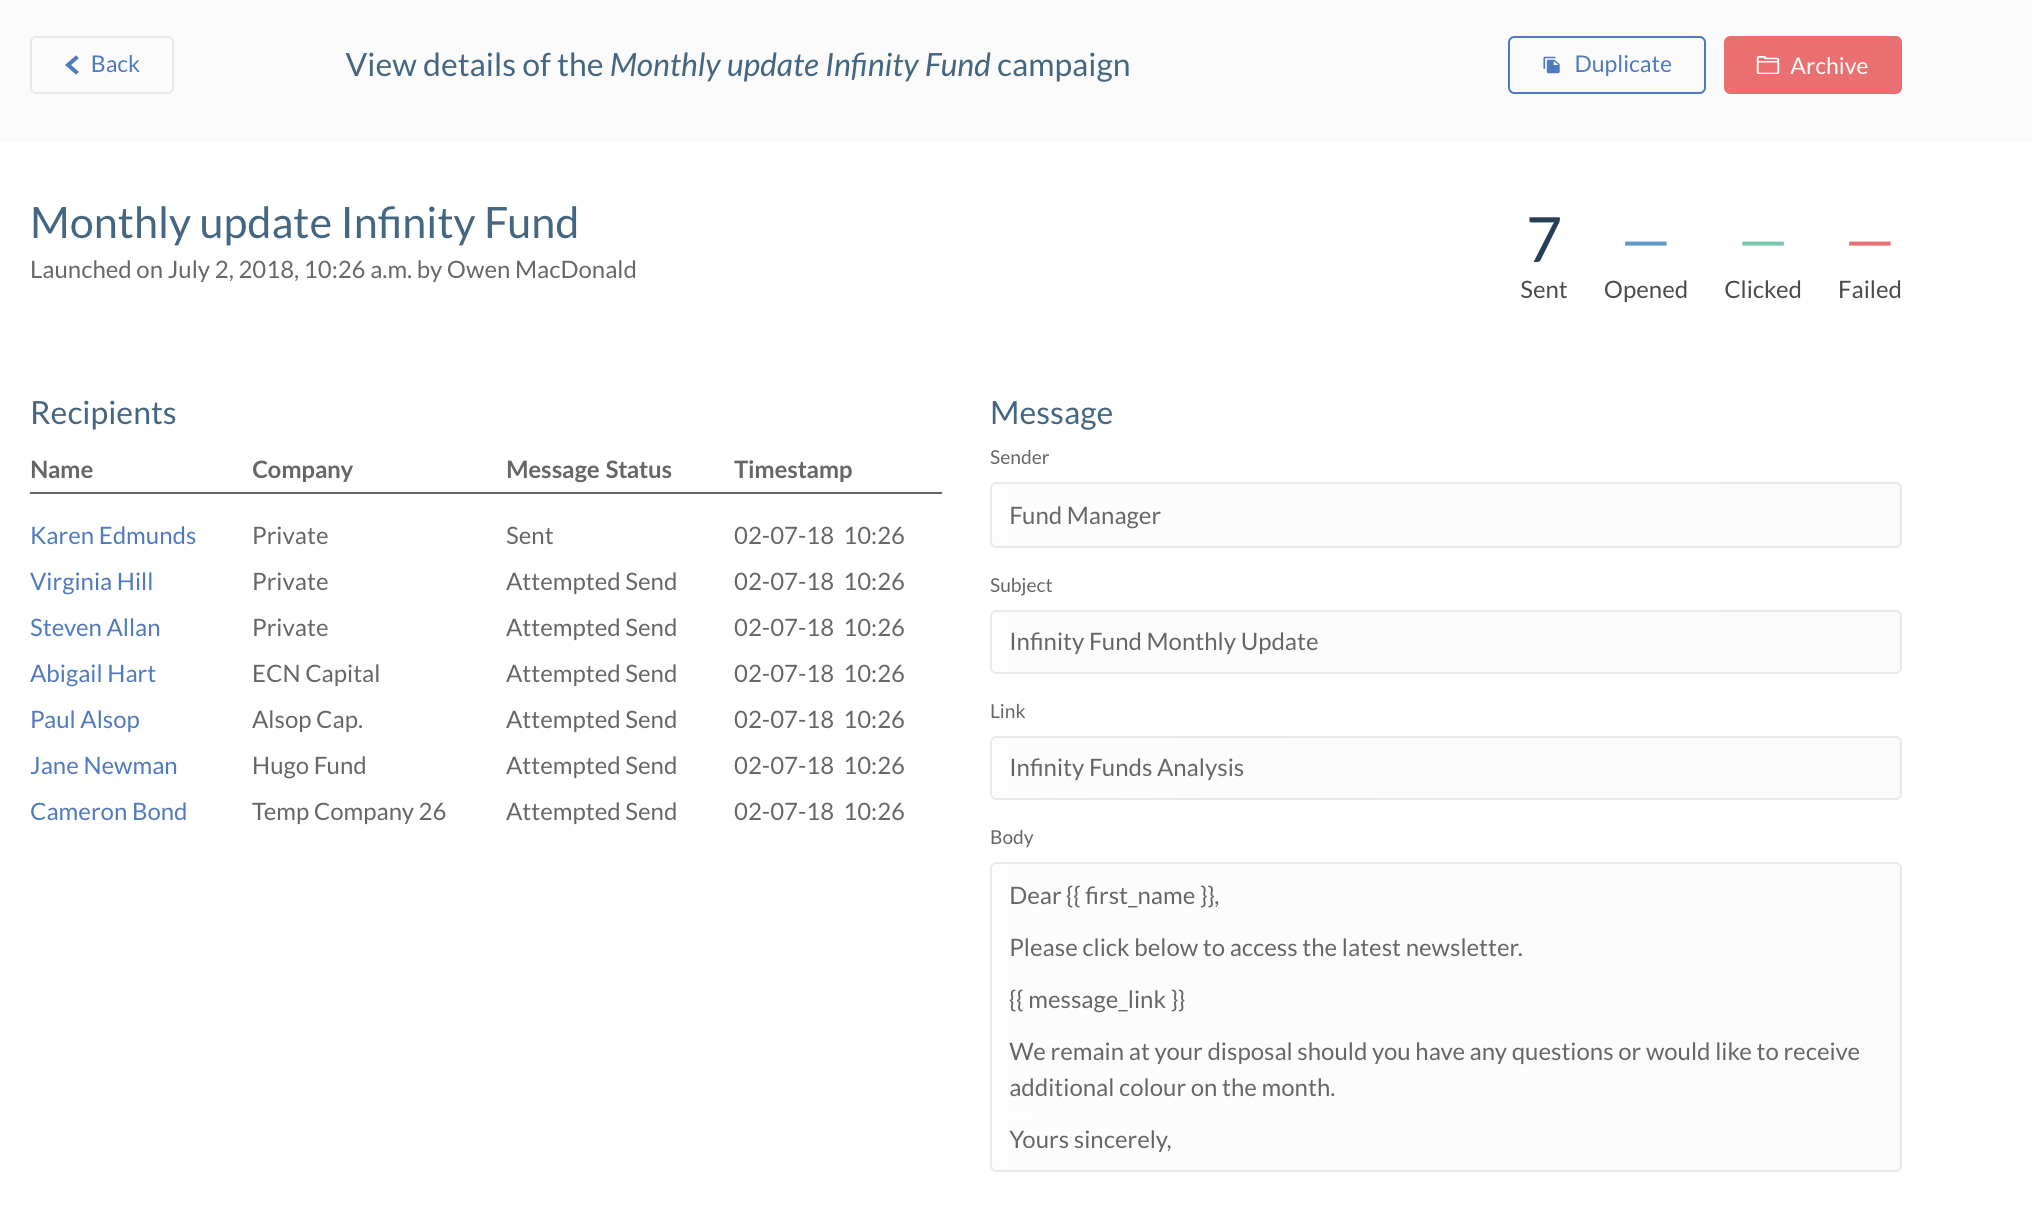
You can find the campaign report to the right from the title of the campaign. The numbers show how many messages were sent in the campaign; how many of them were opened; how many links included in the message (if any) were clicked; and how many messages failed to be sent for some reason (usually because of the wrong email address). The report updates automatically every twenty minutes.
You can choose to View Report where you can see more detailed information about the recipients, as well as status on each of the messages.
SUMMARY:
Create a new mailing list → Go to the Campaigns tab → Click the “Create Campaign” button → Choose a mailing list → Fill out the form → Save or Launch → Check the report of the campaign
3. My Fund has received a new certificate and I would like to share a copy of it with the investors. How can I share the document with a group of investors?
It’s easy to create a new campaign and share a document. Head on over to the Campaigns section, and click the “Create Campaign” button. Now on the left, you can select the recipients by picking them from the drop-down.
If the list you’re hoping to send to doesn’t exist yet, return to the Users section and create one! (Please find instructions in the previous use case.)
Once you created the new mailing list, choose the new mailing list and edit the rest of the form. If you wish to share a new document, you need to upload it to the chosen fund before creating the campaign. (Funds tab → Fund X → Documents tab → “Upload Document” button) Then, whether you share a document or a link to a page, simply choose the item from the dropdown list under Link. Click the “Launch Campaign” button to instantly send the campaign message.
SUMMARY:
Create a new mailing list → Add (new) document to the fund → Go to the Campaigns tab → Click “Create campaign” → Choose the newly created Mailing List → Choose a link or a document → Fill out the rest of the form → Click “Launch Campaign”→ Check the report of the campaign
4. I have been running my fund using FundPortal for three months. Last month I sent a monthly update newsletter which turned out to be very successful, I would like to replicate it. How do I do that?
Under the Campaigns tab, you find a list of past campaigns as well as the short report of their success rate.
A successful campaign will usually have a high number of opened email and/or clicked links. If you click on the “View Report” button you can see a specific overview of users the campaign was sent to and the message status (“Opened” is desired; if status is “Re-send” it means that the message failed to be delivered and you can try and send it again by clicking on the “Re-send” link).
You can choose any campaign launched in the past and send it again. By simply clicking on the “Duplicate” button you will enter a form where all of the fields will be filled out as a copy of the chosen past campaign. You can easily change any of it and send as a new campaign by clicking “Launch Campaign”.
SUMMARY:
Go to the Campaigns tab → Choose a campaign → Click “Duplicate” → Edit the form if needed → Launch Campaign → Check the report of the campaign
FundPortal 3.12 – Full specification of the changes
User management:
The way that you control the data is now revamped, allowing for a CRM-like experience. Specifically, some of the changes include:
– Ability to upload all of your users/contacts databases into the FundPortal, without automatically sending an invitation or email
– Fully editable user data
– Ability to add and keep notes on your users, only visible to you
– Ability to easily manage user permissions (privilege levels) across multiple funds
– Ability to create lists of users for easy management and emailing
– Visitors to your website will be able to fill in a form to register inbound interest (signup requests): these requests go straight to your users’ table, making it easy to grant access
Communication:
The way you use the FundPortal to stay in touch with your investors has also changed:
– You can create email campaigns for your periodic communications, similar to Mailchimp
– You can now email any user or list of users, giving much more flexibility with your investor relations
– Fully customizable emails within the FundPortal, with the ability to save all your email templates to be reused often
– Advanced analytics on the performance of those campaigns; you will be able to see how many emails were delivered, opened, clicked and bounced
– You can duplicate a successful campaign at a click of a button
Miscellaneous:
– Ability to add/remove admin users with one click (Admin will be the highest Privilege Level)
– Ability to see new requests and take immediate actions
– No more CSV files for bulk uploads or updates: only Excel files with better formatting
– Clear and precise status of each of your sent emails: a complete trail of all your outgoing communication
P.S. subscribe to our newsletter, for the latest updates, here!